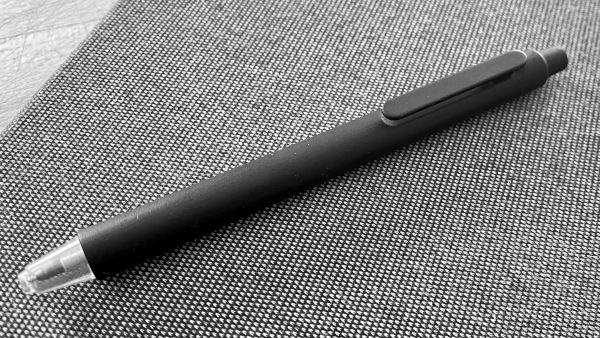
Supernote Pen Flat Black Mod
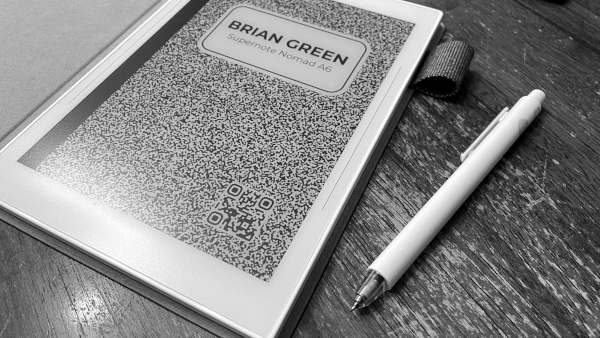
The standard click pen that is built for Supernote devices works incredibly well. It does not require batteries or to be charged to work and it has a ceramic tip that never needs to be replaced. It is not included with the Supernote - but is considered the entry-level pen of choice.
However, as a bit of a pen nerd and avid writer, the pen feels and looks cheap! Even for someone such as myself that loves the classic Pilot G2, the Supernote click pen feels plasticky! It also comes in one color choice, an off white, cream color akin to tobacco stained walls - matching nothing about the design or color form-factor of the Supernote itself. I assume it was the most affordable plastic choice for manufacturing - but could be wrong.
I've been using it as-is for over three months, and now it is time to make it look and feel much better!
Matte Black Mod
Several years ago I purchased a Grafton Pen made by Everyman. It is an incredible well made all-metal pen that accepts the Pilot G2 refill in addition to many more, but who cares about any others, right? If you want a pen that can last a lifetime and double as a handy stabby weapon while looking elegant and feeling great to use - get one! I wanted to try and bring the cream colored, plasticky Supernote click pen somewhere closer to my beloved Grafton pen - challenge accepted.
The Supernote standard click pen does not come apart like a Pilot G2 - as it is not designed to ever need a "refill" - although the inner refill can be purchased separately to allow folks (like me) to build DIY pens. Hint: future blog post...
If it did come apart, I would have likely disassembled it and attempted to permanently color the plastic using a warm dye bath, similar to what I've done in the past with Casio G-Shock components and a ripstop ultralight backpack. But I can't do that - so despite my better judgement I am going to attempt to paint it!
I say, against my better judgement, because in my experience with paint I have had poor results laying down a consistent coat of paint that does not flake off quickly. Note: this is entirely user error and likely a lack of knowledge and preparation to use the right paints for the job.
Paint Research
After some scouring of YouTube to watch others explain how to "professionally" paint plastic I realized that it is not only doable, it is quite simple if all the right preparation is done. For example, if the plastic being painted has a shiny gloss finish, it is better to use a extra fine sandpaper to likely scratch the surface to provide adequate texture for the paint to adhere to the surface and not easily flake off. Likewise, any oils of grease of any kind on the surface will result in the paint peeling off - even the slightest of oil from your fingers. So cleaning and degreasing is essential. Finally, and the step I always skipped/ignored because I thought I knew better, was to use a primer coat that is designed with maximum adherence to the surface and which allows the final paint coat to 'stick' to the primer.
The Process
- Prepare shiny surfaces with extra-fine sandpaper to remove the gloss finish and provide just enough texture for the primer to grip
- Thoroughly clean, degrease, all surfaces ideally while wearing nitrile gloves to avoid putting fingerprints back on it
- Use a primer designed for the material being painted
- Finish with a top coat of paint and allow to fully dry (days)
Preparation
As I previously mentioned, the plastic surface of the Supernote Standard click pen is a high gloss. It was pretty obvious to me that no matter how carefully I applied paint or what type of paint I used, it would likely not adhere to that surface - and probably just flake right off.
I chose to use masking tape to tape off the clear plastic end (nib) of the pen rather than paint it. I did this for two reasons: 1) I like the look of the clear nib area and think it helps by seeing the end of the pen when writing, 2) it would provide extra insurance that no spray paint accidentally goes up inside the tip mechanism.
Protip: to make holding the pen easier while spraying and while drying, I extended the wrapping of the masking tape on the nib end out past the nib to create a thick tab of tape that I could hold with my fingers and a pair of vice grips while leaving to dry.
Based on my research, I set about using a clean piece of an extra fine (6000 grit) wet & dry paper to remove the glossy finish and create a slight texture for the paint to grip onto. The trick here was not to try and remove any plastic material, but gently rub until the surface had a matte appearance. Take your time and do this carefully and consistently. Pay close attention to the button and clip area as these are high wear and tear areas, ensure you rub under the clip as well.
Remove Grease
This is the perfect time to put on a pair of nitrile gloves so that you avoid adding any skin oils onto the pen surface. To remove all grease and oils from the plastic, I used lighter fluid and a clean piece of paper towel. I squirted the lighter fluid onto the paper towel and carefully rubbed down the entire pen surface, paying attention to the clip area and click button. I did this a few times using clean pieces of paper towel. You don't want to get the pen or the inner workings wet, so patience is key.
Primer Coat
I chose to use Krylon paint products for this project because I've had good results with them in the past and it was a recognizable brand that is easy to find online and at most DIY stores. For the primer coat I used Krylon Pro All-surface Gray Primer. Follow the instructions on the can - shake extremely well, use light passes of paint, allow to dry between coats, and always work in a well ventilated area. This is another good time to wear nitrile disposable gloves to avoid getting grease on any surfaces and to keep your hands clean!
Be patient and apply light coats. You do not have to get it perfect on the first coat. In fact you will likely put it on too thick if you attempt to do so. This coat determines the durability of the overall paint project!
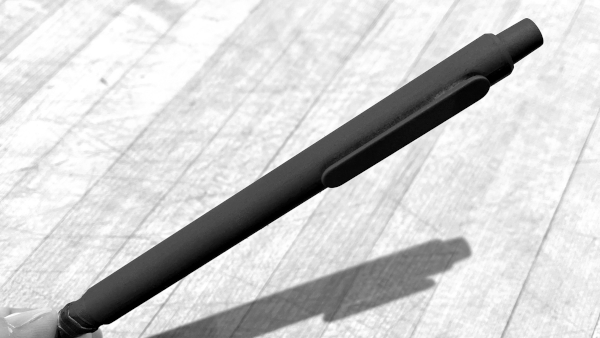
Matte Black Finish
I had already decided to go with a matte (flat) finish top coat of paint. I like the look of a matte finish and thought it would add some grip to the pen when using. This is a personal choice, you can adjust color and finish as you prefer.
For the top coat I used Krylon Color Master Flat Black. As with the primer coat, the goal here is to lay down layers of paint as lightly as possible. That can be excruciatingly slow for some people (and mean you are unable to use your Supernote during the process), but this is not something to be rushed. Follow the directions on the paint can. Allow plenty of time for the paint to dry between coats. Be incredibly careful not to touch the paint.
Drying
Plastic is not porous. Drying times for paint on plastic can be lengthy, and depend on many environment factors - air flow, temperature, humidity. If you've got to this point in the project and laid down a near perfect coat of paint on your pen, you do NOT want to ruin it all by being impatient. The average temp where I live is about 93 degress with medium humidity (cooler inside with AC). I left my pen project hanging in my garage (mild air flow and 90) for three full days before it was fully cured. That was almost unbearable, but that's what it took for the paint to fully cure.
That's it! Take your time, pay attention to prep work, have everything ready, and give it a try. If it goes wrong you can always remove the paint and try again. I hope this was helpful - happy pen mod'ing!