The USB You Hope You'll Never Need
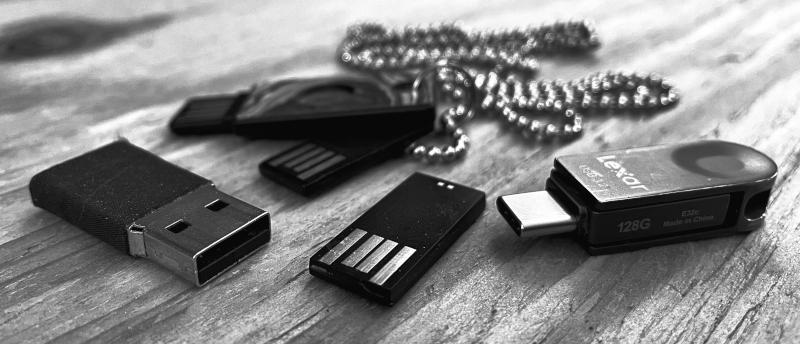 Building a Personal Offline Emergency Archive You Can Carry With You
Most people misunderstand backup.
When they hear the word, they think about backing up everything: every photograph, every document, every hard drive, every email, and every file accumulated over a lifetime.
That's valuable. But that's not what I'm talking about here.
I'm talking about something smaller.
Something you can carry.
Something that lives quietly in your pocket, on your keychain, or somewhere else close to your person. A tiny piece of hardware containing the things that would matter most if you suddenly lost access to your home, your computer, your phone, your cloud accounts, or the internet itself.
Think of it less as a backup drive and more as an offline emergency archive.
A digital equivalent of carrying copies of important documents in a waterproof pouch.
Except this pouch can also contain maps, reference books, family photographs, emergency contacts, useful software, cryptographic recovery information, and perhaps even an entire operating system.
The goal isn't to prepare for the apocalypse.
The goal is simpler:
If everything familiar suddenly became unavailable, what information would you wish you had with you?
That is what goes on this drive. Jump to the Checklist.
The Core Principle: Small, Portable, and Deliberate
The biggest mistake people make when building an emergency archive is trying to copy their entire digital life.
Don't.
That's a different project.
Your emergency USB should be deliberately curated. Every file should answer one of four questions:
- Can this help prove who I am?
- Can this help me recover something important?
- Can this help me function without the internet?
- Would I be devastated if this memory disappeared?
If the answer is no, it probably doesn't belong.
The ideal emergency archive is small enough to carry constantly, but useful enough to matter when circumstances become difficult.
And there is another important principle:
A backup you cannot open is not a backup.
That consideration should influence almost every decision you make.
Architecture: I Recommend Two USB Devices
After thinking through the problem, I believe the cleanest solution is to separate your emergency archive into two devices.
USB #1: Your Personal Emergency Archive
This contains your encrypted personal information:
- Identification documents
- Financial recovery information
- Emergency contacts
- Property documents
- Important records
- Password databases
- Personal keepsakes
- Cryptocurrency recovery information
- Other sensitive material
This is the drive you protect aggressively.
USB #2: Your Offline Tools and Operating System
This contains capability rather than identity:
- A bootable operating system
- Privacy and security tools
- Document viewers
- Offline reference software
- Offline knowledge
- Recovery utilities
Separating the two solves several problems.
Your identity archive can remain small and highly encrypted.
Your tools drive can be larger and more experimental.
And if one device fails, is lost, or becomes compromised, you haven't necessarily lost everything.
This isn't theoretical paranoia. It's basic compartmentalization.
The fewer eggs you put in one basket, the less catastrophic it is when something goes wrong.
Choosing the Physical Device
For something you intend to carry regularly, I would strongly favor a small, conventional USB flash drive.
USB-A still offers excellent compatibility with older and unfamiliar computers, while USB-C is increasingly useful on modern laptops and tablets. A drive with both connectors can be an excellent compromise if you want maximum flexibility.
MicroSD cards are excellent storage media, but they introduce another dependency. A MicroSD card is useless when you need an adapter and don't have one.
An emergency tool should require as few additional pieces as possible.
The drive should ideally be:
- Small enough to carry comfortably
- Physically durable
- Water-resistant if possible
- From a reputable manufacturer
- Large enough that storage isn't constantly a concern
- Common enough to work almost anywhere
Don't obsess over making it microscopic.
The smallest device isn't always the most reliable device.
And remember: flash memory can fail.
This should never be your only copy of anything important.
Your emergency archive is one layer in a larger resilience strategy.
The File System Problem: What Can Almost Anything Read?
For the unencrypted portion of a USB drive, exFAT is probably the best practical compromise.
It is broadly supported across Windows, macOS, and Linux, and unlike FAT32, it doesn't have the familiar 4 GB maximum file size limitation.
That's useful when you're storing large video files, disk images, offline knowledge archives, or large encrypted containers.
There is an important distinction here:
The file system on the outside of your encrypted archive and the file system inside it are two separate decisions.
Outside
An ordinary, broadly compatible file system such as exFAT.
Inside
A strongly encrypted container containing your sensitive files.
This allows the USB device to be recognized by most computers while keeping the important information encrypted.
Full Drive Encryption vs. an Encrypted Container
This is where practicality matters more than theoretical purity.
You could encrypt the entire device. That provides excellent confidentiality, but it creates a problem:
What happens when you encounter a computer that doesn't have your encryption software installed?
This is why I prefer a layered approach for this particular use case.
Option One: Full-Device Encryption
Advantages:
- Everything is protected
- Less information is exposed outside the encrypted volume
- A clean and simple security model
Disadvantages:
- Requires compatible software to access
- Can be inconvenient on unfamiliar computers
- May be more difficult to access during an emergency
Option Two: An Encrypted Container
The drive itself contains an encrypted file or volume, while the physical drive uses a broadly compatible file system.
The sensitive material lives inside the encrypted container.
Advantages:
- The drive can use a widely readable file system
- The encrypted archive is portable
- You can keep non-sensitive instructions and tools outside the encrypted area
- It can be easier to manage across different systems
Disadvantages:
- The existence of encrypted data is obvious
- You still need compatible software to open it
For an emergency archive, I would generally choose an encrypted container rather than encrypting the entire physical drive.
Not because full-drive encryption is weak.
But because the goal here is accessibility under difficult conditions.
VeraCrypt: For the Personal Archive
For this use case, VeraCrypt remains one of the strongest candidates.
It is:
- Free
- Open source
- Available for major desktop operating systems
- Designed specifically for encrypted volumes
- Mature and widely used
For an emergency archive, the attraction is straightforward: you can create a strongly encrypted container containing your most sensitive information while keeping the rest of the physical drive relatively simple.
There is, however, an important limitation that should never be ignored.
The Computer is Part of the Threat Model
Imagine you have the strongest encryption in the world.
You plug your drive into a compromised computer.
You type your password.
Your encryption worked perfectly.
And malware simply records your password.
Your data was protected while locked.
But you voluntarily unlocked it on an untrusted machine.
That's why I would never describe this system as magically safe on any computer.
There is a major difference between:
Can I access this?
and:
Can I safely access this?
Those are not the same question.
A bootable operating system can reduce your dependence on whatever software happens to be installed on an unfamiliar machine, but even that is not a guarantee against compromised hardware.
The Password You Cannot Afford to Forget
Your emergency archive creates an unusual problem.
You need a password strong enough to resist attack.
But you may also need to remember it months, or years, after the last time you used the drive.
Don't create a complicated password and write it on the USB.
And don't rely on remembering something you made up at three o'clock in the morning.
Use a genuinely strong passphrase that you can reliably remember.
Then test yourself.
Wait several weeks.
Can you still unlock the archive?
If not, your emergency backup isn't ready.
What Should Actually Go Inside?
This is where the project becomes personal.
I recommend organizing the encrypted archive into clear categories:
/01_IDENTITY
/02_CONTACTS
/03_FINANCIAL
/04_PROPERTY
/05_MEDICAL
/06_LEGAL
/07_DIGITAL_RECOVERY
/08_CRYPTO
/09_EMERGENCY
/10_KEEPSAKES
The numbers are useful because they keep everything in a predictable order.
Under stress, organization matters.
Identity: Proving Who You Are
Consider encrypted copies of:
- Passport
- Driver's license
- Birth certificate
- Social Security documentation
- Citizenship or immigration documents
- Marriage certificate
- Military records, where applicable
- Professional licenses
- Important identification numbers
The goal isn't necessarily to replace the original document.
A scanned copy of your passport is not your passport.
But copies can make recovery dramatically easier.
They can help you reconstruct document numbers, issuing authorities, dates, addresses, and account relationships.
If your wallet, home, and devices all disappear in the same incident, you will be grateful for documentation that helps reconstruct your life.
Financial Information: Store Recovery Information, Not Reckless Secrets
Financial information requires judgment.
Useful things to preserve include:
- Bank names
- Account numbers where appropriate
- Contact information for financial institutions
- Insurance policies and policy numbers
- Brokerage information
- Loan and mortgage information
- Important tax documents
- Important receipts
- A list of recurring financial obligations
But I would be extremely cautious about casually storing things such as:
- Plaintext banking passwords
- PINs
- Card security codes
- Complete payment card information
Instead, consider using an offline password manager such as KeePassXC.
KeePassXC stores credentials in an encrypted database that you control locally. For an offline emergency archive, that can be preferable to depending entirely on a cloud service.
Your emergency archive should help you recover your accounts, not create an unnecessarily concentrated jackpot for anyone who compromises your password.
Contact Information: The File You'll Actually Use
This might be the most underrated part of the entire archive.
Create a simple emergency contact document.
- Family members
- Close friends
- Attorneys
- Doctors
- Insurance agents
- Employers
- Financial contacts
- Important neighbors
- People who could verify your identity
- People who know where important physical documents are stored
Don't depend entirely on your phone.
Phones get lost.
Phones break.
Accounts become inaccessible.
Create a document that can be opened by almost anything.
A simple PDF and plain-text copy is ideal.
Property and Legal Records
Depending on your life, consider including:
- House deeds
- Property records
- Vehicle titles
- Insurance policies
- Wills
- Powers of attorney
- Trust documents
- Lease agreements
- Important contracts
- Business ownership documents
You don't necessarily need every page of every legal document you've ever signed.
Again: curate.
Ask yourself:
If the originals disappeared tomorrow, which documents would make rebuilding easier?
Those belong here.
Medical Information
Medical information can be particularly useful during displacement or emergencies.
Consider:
- Current medication lists
- Allergies
- Important medical conditions
- Blood type, if known
- Physician contact information
- Insurance information
- Vaccination records
- Important emergency treatment history
Keep this information current.
An emergency archive containing a medication list from five years ago may be worse than useless if someone relies on it.
Digital Recovery: How to Rebuild Your Digital Life
This section deserves more attention than most people give it.
Your digital life is now an ecosystem of email accounts, authentication applications, password managers, cloud storage, social accounts, domain registrations, and financial services.
Create a Digital Recovery Document.
Not a list of passwords in plaintext.
Instead, document:
- Your important email addresses
- Which email account is used to recover other services
- Where your password database is stored
- Where backup codes are stored
- Important domain names
- Important service providers
- Account recovery procedures you may need to remember
Think of it as a map of your digital identity.
If you lose everything, this document tells you where to begin.
Cryptocurrency: Wallet or Seed Phrase?
This deserves an extremely conservative answer.
A cryptocurrency seed phrase is effectively a master key.
Anyone who possesses it may be able to control the associated assets.
So the question isn't simply:
Can I put my seed phrase on the emergency USB?
The better question is:
What happens if this USB is stolen, copied, or eventually compromised?
My general preference would be to avoid putting a plaintext seed phrase anywhere on the drive.
Instead, consider storing:
- A watch-only wallet
- Public addresses
- Wallet software
- Recovery instructions
- Documentation about where physical recovery materials are stored
If you decide to store recovery material digitally, it should be inside strong encryption and should not be your only recovery method.
A single tiny flash drive should never become the sole point of failure protecting significant financial assets.
The Second USB: Your Capability Kit
This is where things become interesting.
Your first drive contains who you are.
Your second drive contains what you can do.
I like the idea of a dedicated operating-system-and-tools drive much better than putting everything together.
A separate bootable USB gives you the possibility of using a familiar environment rather than trusting whatever operating system happens to be installed on the computer in front of you.
Should You Carry Tails?
Tails is worth considering, but with an important caveat.
Tails is designed primarily around privacy and anonymity. It is not necessarily the universal emergency operating system.
It may not boot on every computer. Hardware compatibility can be a problem, particularly with unfamiliar systems.
Still, there is a reason Tails is attractive for this project.
It provides:
- A complete operating environment
- A privacy-focused design
- A bootable system that runs from USB
- Optional encrypted Persistent Storage
The important lesson is this:
Do not build an emergency system you have never actually tested.
Don't put Tails on a USB, throw it in a drawer, and assume you're prepared.
Boot it.
Use it.
Practice accessing your files.
Practice opening documents.
Practice saving information.
Practice shutting it down correctly.
Preparation isn't buying equipment.
Preparation is knowing how to use equipment.
The Unknown Computer Problem
Let's return to one of the hardest requirements:
Assume there is no internet and you encounter a computer running an unknown operating system.
This means your toolkit should contain redundant ways to access important information.
Documents in Standard Formats
- TXT
- JPG
- PNG
These are broadly supported and should remain readable for many years.
Portable Applications Where Practical
Consider keeping copies of:
- A document reader
- An image viewer
- A text editor
- An archive utility
- Encryption software
But remember that portable applications are usually operating-system-specific.
A Windows portable application won't magically run on Linux.
This is another reason a bootable operating system can be valuable.
The operating system gives you a known environment.
The Offline Internet: Kiwix
This is probably the most exciting part of the project.
Yes—you can carry a meaningful portion of the world's knowledge offline.
The tool I would start with is Kiwix.
Kiwix is a free and open-source project designed to provide access to knowledge without an internet connection. It uses compressed offline archives called ZIM files that can contain resources such as Wikipedia, Project Gutenberg, educational material, and other reference collections.
You don't need all of Wikipedia.
In fact, you probably shouldn't start there.
Build your library deliberately.
Knowledge
- Wikipedia
- Wiktionary
- Project Gutenberg
- Educational resources
- E-Books
Medical
- First aid resources
- Emergency medical references
- Publicly available medical guides
Practical Skills
- Gardening
- Plumbing
- Electrical basics
- Mechanical repair
- Food preservation
- Water treatment
- Navigation
Technical Knowledge
- Programming references
- Linux documentation
- Networking references
- Electronics
- Radio fundamentals
The beauty of Kiwix is that you can choose collections based on your available storage.
A 32 GB library is very different from a 512 GB library.
And that's fine.
You don't need to save the internet.
You need to save the knowledge you're most likely to need.
Maps: Don't Forget Where You Are
Offline maps can be enormously useful.
Consider storing:
- Maps of your home region
- State and regional maps
- Road atlases
- Topographic maps
- Evacuation routes
- Maps of important destinations
- Locations of family members
There is one critical lesson here:
Digital maps are excellent. Paper maps don't require electricity.
If navigation is genuinely important to your emergency planning, carry both.
Redundancy is not inefficiency when the systems fail differently.
Keepsakes: The Things Nobody Else Can Replace
This might be the most important section.
Documents can often be replaced.
Memories cannot.
Your emergency archive should include a small collection of things that are personally irreplaceable.
Not necessarily every photograph you've ever taken.
Choose deliberately.
Photographs
- Parents and grandparents
- Children
- Family gatherings
- Important homes
- Pets
- Important life events
Audio
This is something people often forget.
Save recordings of:
- Parents' voices
- Grandparents' voices
- Children when they were young
- Voicemails that matter
- Family stories
A photograph is wonderful.
But hearing the voice of someone you lost can be something else entirely.
Video
- Important family moments
- Children's milestones
- Interviews with older family members
- Holiday gatherings
- Short clips that capture ordinary life
Paper Memories
Scan:
- Letters
- Postcards
- Handwritten notes
- Children's drawings
- Report cards
- Recipes written by relatives
- Old journals
- Family documents
Some of the most valuable things you own may have almost no financial value.
A handwritten recipe from your grandmother cannot be replaced by downloading a recipe from the internet.
Create a Family History Folder
If you're doing this project anyway, create one folder specifically for the future.
Include:
- A simple family tree
- Names and dates
- Important stories
- Where your family came from
- Photographs with names attached
- Explanations of photographs
This last point matters.
A photograph without context eventually becomes anonymous.
You may know who is standing in the photograph.
Your grandchildren may not.
Add captions.
Add names.
Add dates.
Write down the stories.
Future generations will thank you.
The Emergency Read-Me File
Every emergency archive should contain a file called something like:
READ_ME_FIRST.txt
This should explain:
- What the archive contains
- How it is organized
- What software is needed
- Where backups exist
- What the different folders mean
Keep it simple.
Assume that the person opening the drive is stressed.
Maybe that person is you.
Maybe it's someone you trust.
Good organization is a gift to your future self.
Don't Forget the Paper Layer
There is an uncomfortable truth about digital preparedness.
Sometimes the computer won't turn on.
Sometimes there is no electricity.
Sometimes you won't have access to a USB port.
So keep a small physical layer of redundancy.
At minimum, consider carrying paper copies of:
- Emergency contacts
- Important phone numbers
- Medical information
- A small map
- Essential addresses
The digital archive is powerful.
But paper is still the ultimate offline format.
Test It Like You Mean It
This is where most preparedness projects fail.
People build the system.
They feel prepared.
They never test it again.
Every six months, or at least once a year, test the archive.
Can you:
- Find the USB?
- Unlock the encrypted container?
- Remember the passphrase?
- Boot the operating system?
- Open your documents?
- Access your password database?
- Read your offline library?
- Verify that your files are still intact?
Also update:
- Identification documents
- Contact information
- Insurance information
- Medical records
- Financial information
An emergency archive is not a project you finish.
It's something you maintain.
My Recommended Setup
Drive One: The Personal Archive
Physical format: Small, durable USB drive
Outer file system: exFAT
Primary contents: A strongly encrypted VeraCrypt container
Inside:
- Identity documents
- Emergency contacts
- Financial recovery information
- Legal records
- Property information
- Medical information
- A KeePassXC password database
- Digital recovery documentation
- Cryptocurrency recovery information, if appropriate
- Personal keepsakes
Drive Two: The Capability Kit
Primary contents:
- A bootable operating system such as Tails
- Offline tools
- Document utilities
- Encryption tools
- Kiwix
- Offline reference material
- Maps
- Technical documentation
This drive is less about protecting secrets.
It's about restoring capability.
The Most Important Rule
Don't build the perfect system.
Build the system you will actually maintain.
The perfect encrypted archive that requires twelve pieces of specialized software, three adapters, administrator access, an internet connection, and a 900-page instruction manual is not preparedness.
It's a hobby project.
Your emergency archive should be boring.
Simple.
Reliable.
Tested.
The best system is the one you can use when you're tired, stressed, displaced, and dealing with a computer you've never seen before.
Because that is the moment it matters.
One Final Thought
We spend enormous amounts of time preparing for small inconveniences.
We insure our homes.
We back up our phones.
We carry spare chargers.
We save passwords in the cloud.
But very few people stop and ask:
If I had to walk away from everything today, what information would I want in my pocket?
That's the question this project answers.
Not everything.
Just the important things.
Proof of who you are.
The information needed to rebuild.
The tools needed to function.
A small library of knowledge.
And the memories you would hate to lose.
Put those things somewhere small.
Encrypt them.
Test them.
Carry them.
And then hopefully never need them.
Quick-Start Checklist
If all of this feels like a large project, don't overthink it.
You don't need to build the perfect emergency archive on day one.
Start with the basics and improve it over time.
Step 1: Get the Hardware
- Choose a small, durable USB drive for your personal archive.
- Consider a second USB drive for your operating system and offline tools.
- If possible, choose drives with broad USB compatibility.
Step 2: Create the Personal Archive
- Format the personal archive drive using exFAT.
- Create a strongly encrypted container using VeraCrypt.
- Choose a strong passphrase that you can reliably remember.
- Do not make the USB drive your only copy of anything important.
Step 3: Add the Essentials
Start with the things that would be hardest to reconstruct:
- Identification documents
- Emergency contacts
- Insurance information
- Important financial and property records
- Medical information
- A digital recovery document
- An encrypted password database, such as one created with KeePassXC
Step 4: Add the Things You Can't Replace
- Favorite family photographs
- Important videos
- Recordings of family members' voices
- Letters and handwritten notes
- Children's artwork and school memories
- Family history and stories
Don't try to save everything.
Start with the things you would most regret losing.
Step 5: Build the Capability Kit
- Create a separate bootable USB.
- Consider installing Tails or another suitable open-source operating system.
- Add useful offline utilities and document tools.
- Add the Kiwix reader and a carefully selected offline knowledge library.
- Add offline maps and other reference material relevant to your location and likely needs.
Step 6: Create a Simple Read-Me File
Create a file called:
READ_ME_FIRST.txt
Keep it simple. Explain what is on the drives, how the files are organized, and what software may be needed to access them.
Step 7: Test Everything
- Can you unlock the encrypted archive?
- Can you remember the passphrase?
- Can you open your documents?
- Can you access your password database?
- Can you boot the operating system?
- Can you search your offline knowledge library?
- Can you find the information you need quickly?
If you haven't tested it, don't assume it works.
Step 8: Maintain It
- Review the archive every six to twelve months.
- Replace expired identification documents.
- Update contact information.
- Update medical information.
- Add new keepsakes and family memories.
- Check that the drives are still readable.
Your goal is not perfection.
Your goal is to finish with something small, useful, encrypted, tested, and ready to go.
You can improve it from there.